

In this project we will create an app that contain a Button and a TextView. When you click on the button it'll change to another screen that have a "Hello My Friend!!" text and play some sound. Interesting?
Download Android Sample Code Here
This Article You Will Learn:
- How to connect UI to your code
- How to use Intent to start new Activity
- How to Multithread programming
- How to play a sound
Ok, let's move on...
And... Hey! I'll never tell you about how to install the Android SDK or Setting up your work environment because you can find it in various site on the internet just ask Google
Using eclipse. First, Create a new Android Project named "HelloFriend".
I use android platform 2.3.3 (API level 10) and set package name to "com.massdstu.hello"

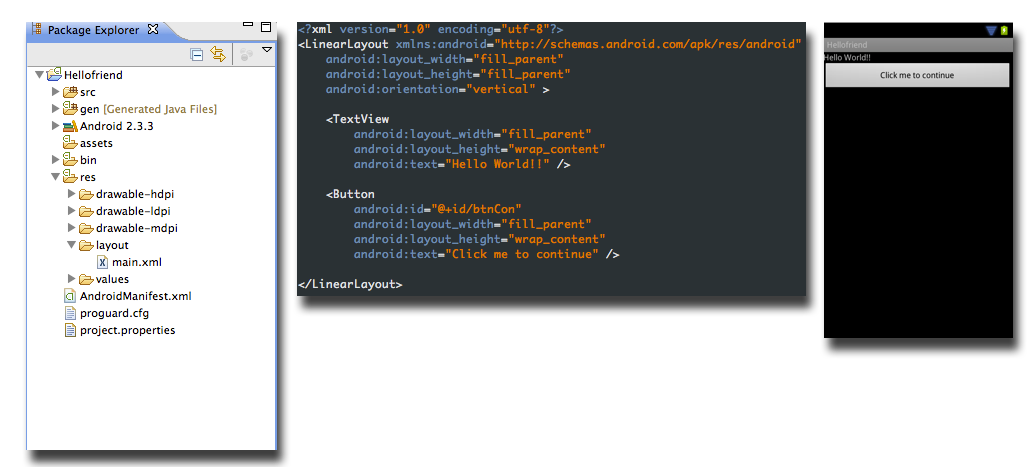
Next, open main.xml in Package Explorer and edit code like this below then you will get an UI with one TextView and one Button
Next, make a copy of main.xml and rename it to main2.xml in the same folder (/res/layout) and edit code like the below

Next, Create a class named "HelloAgain.java" and edit code like the below:


This project has more than one activity. So, we must add activity to AndroidManifest.xml

Ok! it's nearly done, first, create a folder name it as "raw" under "/res" folder and download this sound and put it in raw folder.
Then, open HelloFriendActivity.java and edit the code:
package com.massdstu.hello;
import android.app.Activity;
import android.content.Intent;
import android.media.MediaPlayer;
import android.os.Bundle;
import android.view.View;
import android.widget.Button;
public class HellofriendActivity extends Activity {
/** Called when the activity is first created. */
Button btnCon;
MediaPlayer mp;
@Override
public void onCreate(Bundle savedInstanceState) {
super.onCreate(savedInstanceState);
setContentView(R.layout.main);
btnCon = (Button)findViewById(R.id.btnCon);
btnCon.setOnClickListener(new View.OnClickListener() {
@Override
public void onClick(View v) {
// TODO Auto-generated method stub
if (mp != null)
mp.release();
new Thread(new Runnable() {
public void run() {
try {
mp = MediaPlayer.create(getApplicationContext(),R.raw.ring);
mp.start();
} catch (Exception e) {
e.printStackTrace();
}
}
}).start();
Intent i = new Intent(getApplicationContext(),HelloAgain.class);
startActivity(i);
}
});
}
}
Yeah!! It's done!!! Then, let's run this application by press Run button or command + Fn + Shift+ F11 key (in OSX). While application run you'll see text "Hello World" and a continue button. If you click on the button, you'll here a ring sound and it'll bring you to the second screen that have a text "Hello My Friends".
This is The first part of the project. In the second part I'll explain you about What you are coding in this app. See you in next part.
- vyppN-
No comments:
Post a Comment